Thursday, October 21, 2010

Knee pistons


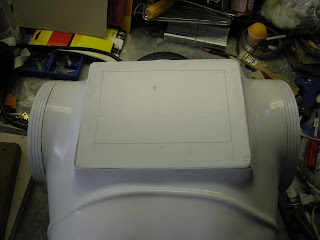
I got the Knee pistons from GA. Not too bad imo. They are halves, which will need sanded and glued together.

I removed the lower tube part and replaced it with a styrene tube. This straightens it. The top and bottom half were shaved down to fit inside the tube.

Monday, October 18, 2010

calf hinges or Swiss cheese anyone?


Been working on little bits here and there. Mostly sanding and such. I've attached the hinges to the calf area, as they were on the original suit. In hindesight, it might have been better to predrill the holes in the LEGS first, then modify the hinges to fit, not the other way round. I tried drilling from the inside out and, well it didnt quite work out the best, as the drill was on an angle.Finding a screwdriver small enough to fit between was also a challenge. Oh well, thank the maker for Apoxy sculpt, ay?


The screws are screwed in from the inside, and the protuding ends ground off.Oh, how the sparks flew. gotta remember that. Anyway, i removed the pins from the hinges BEFORE i attached them, and replaced them with a piece of wire or tin nail. This way the calf can stay hindged or come off completely.

Saturday, August 28, 2010

Can I give you a hand..?


The kit included the back of the hand plates, but no real fingers. After studying the resin display hands i purchased ( see earlier posts) i resculpted the fingers with Super sculpy. Templates were created from tracings using tissue paper draped over the resin hands. The templates were then traced onto the scuply. After forming over a mannequin hand, these were baked to harden. Final steps will be trimming,primer and sanding.

Sculpting this and that..


Resculpted the throat greeblie. The one that came with the kit was a bit rough. I actually used the back part of the Riddel C3PO helmet as a model, as it seemed to be the right size and basic shape.In the photos ( left to right) are the kit part, wax copy and final piece. Pretty pleased with the way it turned out.

Monday, June 21, 2010

Wrist details


I added the detail to the wrist. I covered the existing end of the arm with apoxy sculpt, and while it was still soft, used a medicine bottle lid to sculpt the grooves. after it dries, this stuff is tough as nails. so no fear of chipping. :)


Cutting some strips from thin styrene, i attached these to the wrists ontop of the grooves. This will give it a cleaner look rather than trying to sculpt in the detail.


Close up of wrist detail(with display hands).

Friday, June 18, 2010

Mounting the backplate


I started working on mounting the resin backplate to replace the vac-formed back of the suit. I cut the back open, leaving enough surrounding material to mount a flat piece of ABS. This will then have the center removed to allow access for changing batteries, etc. The resin plate will attach with magnets so that it can be easily removed.


One thing i noticed was that the back part of the suit is slightly off due to the way it was formed. This made the new back plate not lay flat. I had to make some adjustments and will need to patch over the seam on the left side. It does look better and lays flush.

Saturday, May 8, 2010

Shoulder detail added


I've added the detail on the top of the shoulder. Two ridges that start at the neck and end were the shoulder bell connects.


I've overlapped the front over the back of the torso, so that the seam is hidden. It adds an extra strength point to the front and back connection too


This last shot shows the ridges after the edges have been sanded. They are rounded as opposed to rectangular and sharp. All in all i am pleased with the way they look. I still need to back fill at the neck a bit.

Tuesday, April 20, 2010


Since alot of the detail was missing on the thermal cast of the torso bely area, i decided to add most of the included resin belly plate. Using a compass and xacto, i cut out the inner circular area. This would then leave a lip around which i could mount the belly plate from the inside.


The center of the resin plate was routered out to allow a speaker to be added. I trimmed the outer diameter down quite a bit so it would line up easier.


I then used a belt sander to remove most of the thickness to the resin cast piece.


The mounted resin belly plate.

Sunday, April 11, 2010

neckring mounted, finally!


Well, i've finally got the blasted neckring mounted. It took some doing, as it needs to sit straight and all. Then came the back filling with epoxy sculpt and the endless sanding. But it turned out pretty good i must say.


A side view and a view of how the two halves connect.I could have just cut straight down the middle, but where is the fun in that? Besides, this is how the actual suit connects.

Wednesday, February 17, 2010

Pain in the neck-ring

after studying the collar/neck ring, i tried to think of a way to construct it. it looked simple enough, just a few rings stacked on top of each other.Having looked at more detailed photos, however, i noticed the complexity. i started by sculpting one half, thinking i could mold the other half. realizing this wasn't going to work, i decided i would try to sculpt the entire neck ring out of super sculpey. ahem..after several days and trials, i ended up with one that i was okay with.I hardend it in the oven and primered and started sanding. it still seemed off to me.


I then decided to see if i could solicit the talents of a machinist. A CNC machinist, to be exact. I posted several ads, with no response. I did a detailed sketch,and had a builder ( Jerry Greene) render it into detailed plans.After emailing it to a local shop, they agreed to do it, but the cost was way more than my budget would allow. "Will this never end?" A friend and fellow builder Chris Bartlett mentioned posting the request on the R2D2 builders board. (shhhh, don't tell 3po that he needed R2's help for this one). I got a response from "commando eight/James" and zipped the plans off to him. Well, i wish i would have sought him out sooner. The collars turned out ExCELLENT! I couldn't have been more satisfied.


Wednesday, February 10, 2010

torso mods


The shoulder rings were built with strip styrene fused to a thin piece of abs. This was then mounted to the shoulder using a tab method. Hmmm i guess the education i got was worth it. anyway, the rings are in two parts, mounted front and back with a seam at the top and bottom. The top seam will be covered by the shoulder bell mount. the bottom seam won't be visable, at least i hope not.

mounted greeblies and pistons


Here are the elbow greeblies and pistons mounted on the new arms. The pistons were out sourced from another builder. They do actually function quite well.After researching the costume photos, I noticed the elbow greeblies are mounted opposite of each other on opposing arms. A small detail, but i wanted to get it right the first time.

scratch built greeblies


These greeblies i scratch built from different parts. i think they more closely resemble the actual ones. Some of the items used are a bottle top from a dropper bottle, small plastic washers and a thumb wheel from a lip balm tube.
I molded them and cast them in resin, and will post the mounted pictures in the next blog.