Monday, October 22, 2012
Testing 1..2..3..
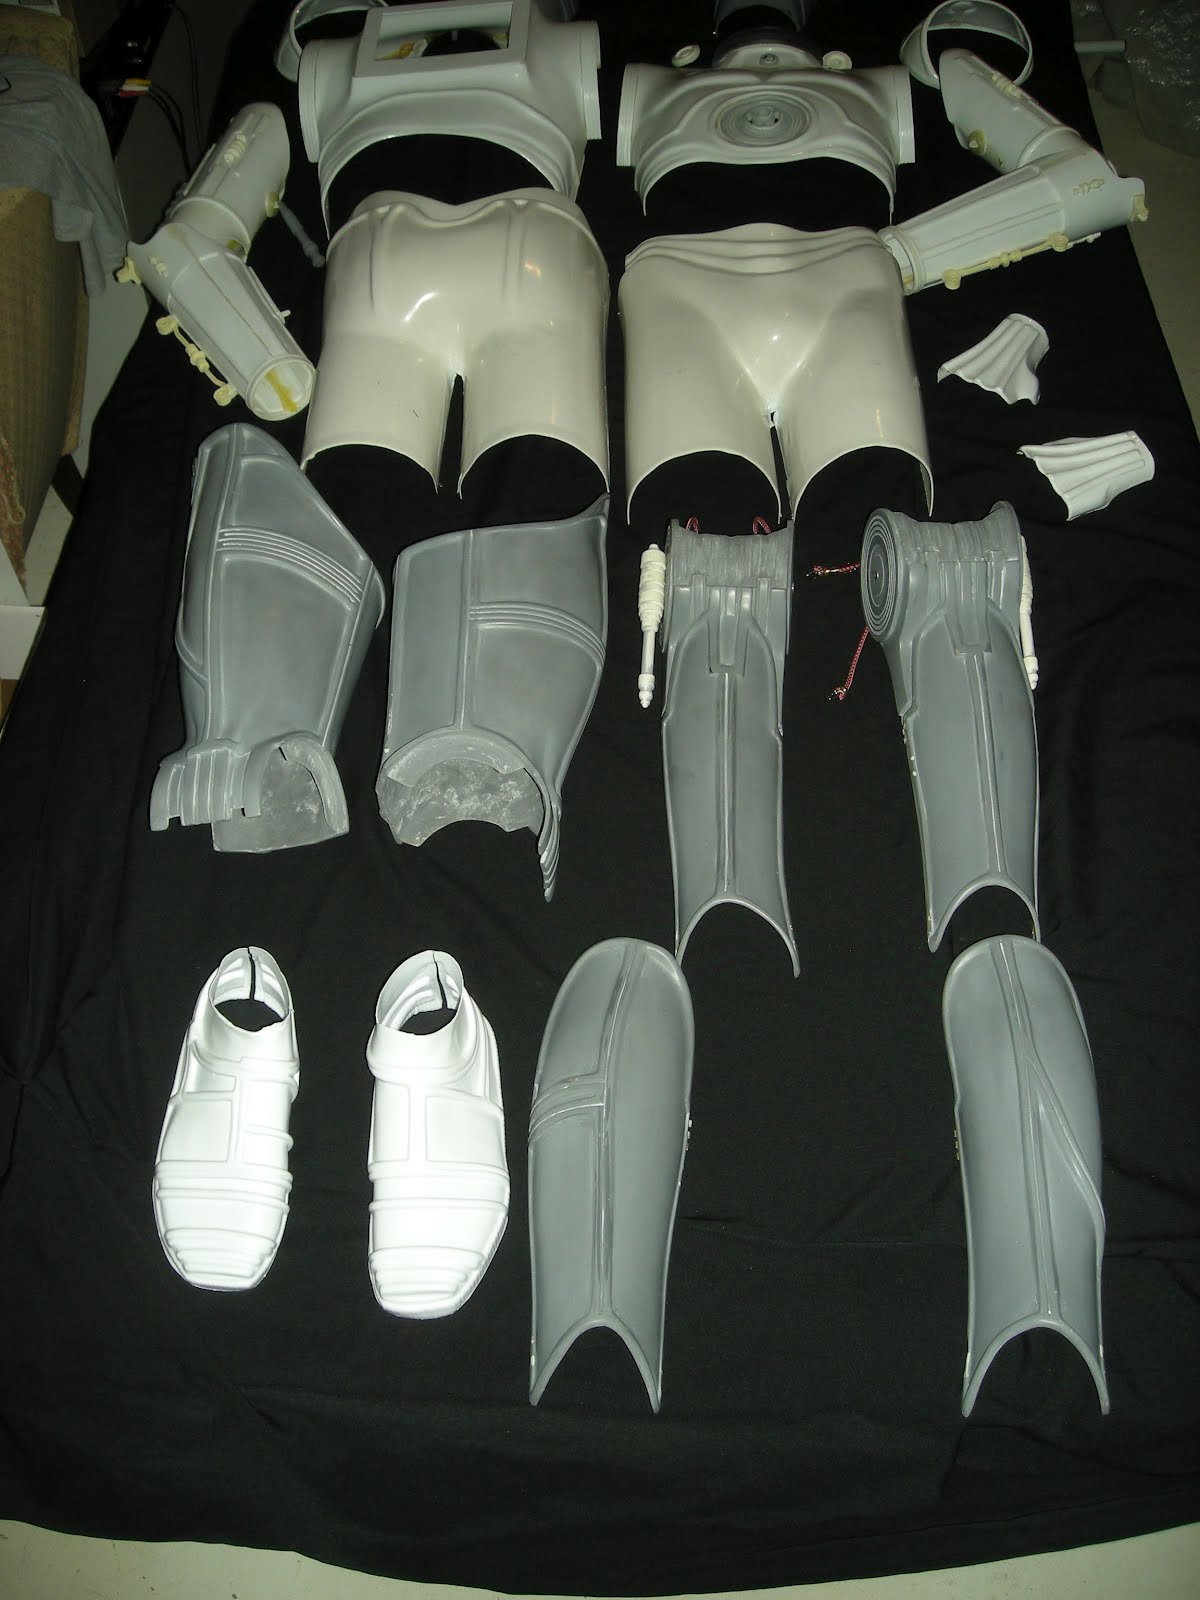
I was trying to get the suit done in time for the Star Wars Reads day. I wanted to appear as C-3po, so i had someone take photos of me in the suit to submit for approval. This is the FIRST time i was completely suited up. It took over an hour, and was a bit of a learning experience. There were problems getting the hinges to line up on the calf sections, so the next time i decided to leave the calfs together, and just open the side facing out to slip them on. Traveling further up the legs, the Bungees have a hook on them that was too thick. it dug into my knee. I have since replaced them with an "s" hook, and just bent the hook about 90 degrees to attach to the tops of the thighs. The shorts however, seem to keep popping out when i try to walk. I left a trail of gold.... 3po WAS HERE.
wiring update and some bling
Well, here is the torso corset all together.
The wires are composed of S'getti's bracelet tubing, and real wires. I chose some old speaker wire, since it tends to be more flexible. I also had some odds and ends I was saving from various old stuff, like a broken Atari joystick, so I threw those in as well. Turned out pretty good.
Monday, August 27, 2012
Wow! Has it really been a year? Cant believe how time fly s. I appreciate those that have stayed with me, hope i havent bored you too much. Anyway, not much new happened, really. Got some replacement parts and continued to sand, sand, sand. The finisher need the surface to be as smooth as possible. i sanded all the way up to 1000 grit.
Waiting is the hardest part. I had to save up money in order to get the gold chrome finish. I chose to go with the Spray Chrome. it is more expensive, and requires more prep work, but it is more durable than the Vac Plating and looks just as good, if not better...but more on that later.
I did order a set of New Hands and Feet from MonCal. They are very well done, and will be great to wear. I did have to wait quite a while, as these parts do take alot of trial and error. But in the end i was very satisfied.
I actually drove the parts to the finisher,minus the new hands and feet, who, lucky for me, lives in the same state about an hour and a half away. Shipping all those parts is a beast. Just loading them into the car was a challenge in itself. But, none the less, i did it. The guy the owns the shop has done a few suits before, and is familiar with what needs done. I felt pretty good leaving my work in his more than capable hands.He actually gave me a tour, explained the process, and worked with in my deadline. A true professional.
Now, lets see, oh, while the parts were getting all shiny and gilded, i started to work on the soft parts. Namely the Belly wires. I have a mannequn torso that came in handy for trying to form the paper template. It seems paper doesnt like to bend every which way. Imagine that. Anyhow, I formed it around the torso as close to the body as possible. I made it extra lond at the top to allow for trimming.
The front part wasnt to bad...
however the back...was a real pain in the ..well, you get the idea. Trying to not tear the paper, and get all kinds of folds and wrinkles..yeesh. It all worked out in the, uh.. ahem, end.
The black part of the torso in the original films was a rubber mat. It was changed in the new trilogy to a silicone casting to make it more comfortable for Mr. Daniels. Since i didn't feel like wearing a floor mat around my waist, i chose to go with black corduroy material. I bought some Plasti-dip in a spray and sprayed several layers onto the corduroy to give it a similar look. Turned out pretty good.The material will be attached to the foam backer to stiffen it, and act as a corset. Not that i need it mind you. ( hehe).
I actually drove the parts to the finisher,minus the new hands and feet, who, lucky for me, lives in the same state about an hour and a half away. Shipping all those parts is a beast. Just loading them into the car was a challenge in itself. But, none the less, i did it. The guy the owns the shop has done a few suits before, and is familiar with what needs done. I felt pretty good leaving my work in his more than capable hands.He actually gave me a tour, explained the process, and worked with in my deadline. A true professional.
Now, lets see, oh, while the parts were getting all shiny and gilded, i started to work on the soft parts. Namely the Belly wires. I have a mannequn torso that came in handy for trying to form the paper template. It seems paper doesnt like to bend every which way. Imagine that. Anyhow, I formed it around the torso as close to the body as possible. I made it extra lond at the top to allow for trimming.
The front part wasnt to bad...
however the back...was a real pain in the ..well, you get the idea. Trying to not tear the paper, and get all kinds of folds and wrinkles..yeesh. It all worked out in the, uh.. ahem, end.
The black part of the torso in the original films was a rubber mat. It was changed in the new trilogy to a silicone casting to make it more comfortable for Mr. Daniels. Since i didn't feel like wearing a floor mat around my waist, i chose to go with black corduroy material. I bought some Plasti-dip in a spray and sprayed several layers onto the corduroy to give it a similar look. Turned out pretty good.The material will be attached to the foam backer to stiffen it, and act as a corset. Not that i need it mind you. ( hehe).
Friday, September 9, 2011
Helmet Mods
I decided to modify the helmet to make it fit better.
There was a knob at the top that fit into the back part of the helmet, but when i tried it on, it was too tight on the top of my head. After looking at reference for the real helmet, i noticed that the top has a notch cut out. I decided to give this a try.
I removed the notch and it fits much better now. I also sanded down the sides and top in the inside considerably. This gives it a little more flex. For VAC-PLATING, this is a no-no. I will be using the SPRAY-CHROME ( not the rattle can) method. But more on that later.
The above pic also shows that i removed the nuts inside the sides that connect the ear-knobs. I flattened this area and used the POST connectors mentioned earlier. This also allows more room, especially around the neck.
( red tape is temporarily holding them in place.)
The top will connect like the original, with an "O" ring-post attached to the front half, and the ANTENNA holding it in place.
Stay tuned.....;-)
Sunday, July 3, 2011
a few updates since last time
Well, haven't been updating in awhile.
Mostly because i was sanding parts. Talk about tedium and boring.
Anyway, I found these little things to be quite helpful. Found them at Lowe's in the hardware section. They are usually in the drawers where the screws and bolts and nuts are found.


I've used them for the inside of the knee area, and also for the pivot joints on the arms at the elbows. They work great.

Here i have drilled out a hole in the knee piston for the screw head, then applied an apoxy glue to hold it in place.

Mostly because i was sanding parts. Talk about tedium and boring.
Anyway, I found these little things to be quite helpful. Found them at Lowe's in the hardware section. They are usually in the drawers where the screws and bolts and nuts are found.
I've used them for the inside of the knee area, and also for the pivot joints on the arms at the elbows. They work great.
Here i have drilled out a hole in the knee piston for the screw head, then applied an apoxy glue to hold it in place.
Thursday, October 21, 2010
Knee pistons
Monday, October 18, 2010
calf hinges or Swiss cheese anyone?
Been working on little bits here and there. Mostly sanding and such. I've attached the hinges to the calf area, as they were on the original suit. In hindesight, it might have been better to predrill the holes in the LEGS first, then modify the hinges to fit, not the other way round. I tried drilling from the inside out and, well it didnt quite work out the best, as the drill was on an angle.Finding a screwdriver small enough to fit between was also a challenge. Oh well, thank the maker for Apoxy sculpt, ay?
The screws are screwed in from the inside, and the protuding ends ground off.Oh, how the sparks flew. gotta remember that. Anyway, i removed the pins from the hinges BEFORE i attached them, and replaced them with a piece of wire or tin nail. This way the calf can stay hindged or come off completely.
Saturday, August 28, 2010
Can I give you a hand..?
The kit included the back of the hand plates, but no real fingers. After studying the resin display hands i purchased ( see earlier posts) i resculpted the fingers with Super sculpy. Templates were created from tracings using tissue paper draped over the resin hands. The templates were then traced onto the scuply. After forming over a mannequin hand, these were baked to harden. Final steps will be trimming,primer and sanding.
Sculpting this and that..
Resculpted the throat greeblie. The one that came with the kit was a bit rough. I actually used the back part of the Riddel C3PO helmet as a model, as it seemed to be the right size and basic shape.In the photos ( left to right) are the kit part, wax copy and final piece. Pretty pleased with the way it turned out.
Monday, June 21, 2010
Wrist details
I added the detail to the wrist. I covered the existing end of the arm with apoxy sculpt, and while it was still soft, used a medicine bottle lid to sculpt the grooves. after it dries, this stuff is tough as nails. so no fear of chipping. :)
Cutting some strips from thin styrene, i attached these to the wrists ontop of the grooves. This will give it a cleaner look rather than trying to sculpt in the detail.
Close up of wrist detail(with display hands).
Friday, June 18, 2010
Mounting the backplate
I started working on mounting the resin backplate to replace the vac-formed back of the suit. I cut the back open, leaving enough surrounding material to mount a flat piece of ABS. This will then have the center removed to allow access for changing batteries, etc. The resin plate will attach with magnets so that it can be easily removed.
One thing i noticed was that the back part of the suit is slightly off due to the way it was formed. This made the new back plate not lay flat. I had to make some adjustments and will need to patch over the seam on the left side. It does look better and lays flush.
Saturday, May 8, 2010
Shoulder detail added
I've added the detail on the top of the shoulder. Two ridges that start at the neck and end were the shoulder bell connects.
I've overlapped the front over the back of the torso, so that the seam is hidden. It adds an extra strength point to the front and back connection too
This last shot shows the ridges after the edges have been sanded. They are rounded as opposed to rectangular and sharp. All in all i am pleased with the way they look. I still need to back fill at the neck a bit.
Tuesday, April 20, 2010
Since alot of the detail was missing on the thermal cast of the torso bely area, i decided to add most of the included resin belly plate. Using a compass and xacto, i cut out the inner circular area. This would then leave a lip around which i could mount the belly plate from the inside.
The center of the resin plate was routered out to allow a speaker to be added. I trimmed the outer diameter down quite a bit so it would line up easier.
I then used a belt sander to remove most of the thickness to the resin cast piece.
The mounted resin belly plate.
Sunday, April 11, 2010
neckring mounted, finally!
Well, i've finally got the blasted neckring mounted. It took some doing, as it needs to sit straight and all. Then came the back filling with epoxy sculpt and the endless sanding. But it turned out pretty good i must say.
A side view and a view of how the two halves connect.I could have just cut straight down the middle, but where is the fun in that? Besides, this is how the actual suit connects.
Subscribe to:
Posts (Atom)